colour-conscious graphics!

This week we discussed the question: “Why might you want to create your own images or graphics for teaching and learning?” While I already have some thoughts on this, it was fun to experiment with image editing and explore the multimedia learning theory!

I have previously posted a graphic that I created on this blog, hinting at the many more projects I have saved in my “resources” folder. I think it’s great to be able to design worksheets, posters, labels, and more for your classroom. It provides a personal touch and keeps your room cohesive in colours and design elements! I started making simple resources during my first year of university since I found it was an effective motivator to allow me to visualize my future learning and teaching environment.

While creating various designs, I learned to be conscious of designing full-colour resources. This idea was reiterated in our class today, as Michael stressed the importance of being conservative with ink usage due to printing costs. Another option is creating a colouring-sheet type of resource, with white designs outlined in black that students can personalize with crayons or any suitable art medium. A friend who works with an older age group at a local middle school also gave me the idea of adding a blank box/area for the students to be able to draw right on a worksheet! These drawings should be related to the content, but regardless, it’s a wonderful opportunity for creativity and a “brain-break” for tired or burnt-out students.

Relating back to coloured resources, I have lots of re-designing to do when it comes to actually printing my premade resources. For example, I’ve put together a series of alphabet posters. These are in full colour, from the background to the little image representing each letter! Now, I think I could convert these to black and white colouring sheets for the students to colour in however they like—this would be amazing for the beginning of the year! It could be an opportunity for social collaboration and getting to know the students. I could also print these images on coloured construction paper, and draw an image over top. There are so many ways to avoid exuberant printing costs, and those are just a couple that came to mind!

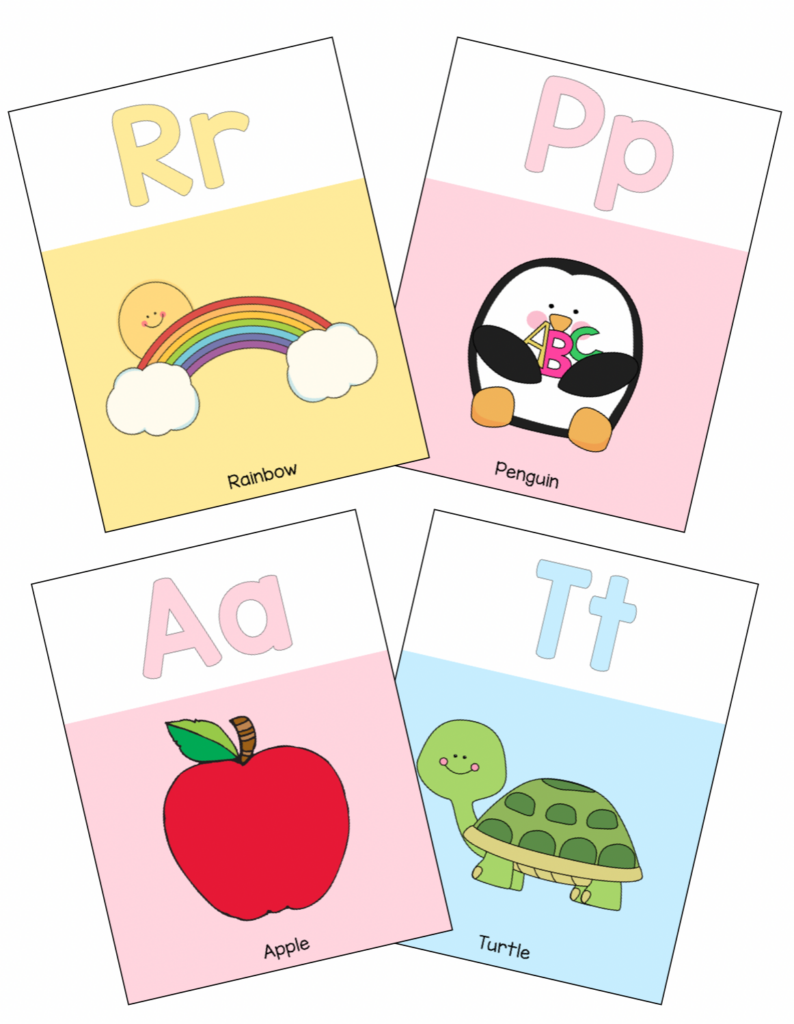
a sample of my simple alphabet posters—the graphics can be found here!

This discussion served as a reminder for me to keep creating resources and speaking to my mentor teacher and peers on ideas for these designs or what elements work in classroom settings of any grade!

creating pieces with family <3

This week, I decided to test my patience by working with very small beads…and my younger brother. I’m often drawn to larger, more detailed lamp-worked beads, so I was excited to handle these easily breakable pieces.

I sourced these light green seed beads labelled “pale avocado vintage beads” at a store downtown that sold them in bulk inside a plastic container. (On a side note, I dumped out the pot of beads when I started stringing them…do not make the same mistake as me.)

here are some similar seed beads!

After sifting through several thoughts of various pieces I could create with these tiny cylinders, I ended up sticking with what I was comfortable with = necklaces! One of the ideas was to re-create a bow-shaped set of earrings similar to the pair below! While I love these, I quickly realized how ambitious this would be since I have only made one pair of earrings with the help of a professional jeweller maker to assemble them. One day, I may construct these earrings when I have more time!

these earrings are much larger than I was envisioning, but you get the picture!

The avocado-coloured beads were still very finicky to work with, even for a simple necklace. I used them alongside larger round pink glass beads. To avoid a predictable pattern, I broke up the order of the beads, using Swarovski crystals in angular, faceted shapes. 

using a tray to organize the seed beads was essential!

Since I had yet to learn how to manipulate the wire to create shapes with the miniature beads, I needed to find an alternative centrepiece for the necklace. While browsing another bead shop, my brother found this golden “hat“ to fit above a charm. So, I used this cap with a slightly larger version of the pink round pieces to attach the two together! 

the completed charm

In connecting this process to an earlier statement about how this craft can be a beneficial activity to “[build] connections and memories with family and friends…” I created this piece with my talented little brother while he was visiting from Vancouver. While he was with me, he made two adorable bracelets. He picked out all the beads and strung them on elastic in the order of his choosing. I helped him with the more technical sides of jewellery making—measuring the elastic string and closing it off—so he could enjoy the imaginative aspect of the activity. He loved it, and I loved that we now have another creative activity to do together!

I couldn’t capture his second bracelet before he ran off with the finished piece, so imagine a bright blue arrangement of beads with several dolphins throughout.

Since my necklace included neutral colours (in my personal palette), I can see myself wearing this often, layering it with charm necklaces. Overall, this piece was about the creative experience with loved ones <3 

the finished necklace!

the gema necklace: inspiration vs imitation

Over the summer, I came across a multicoloured crystal necklace displayed in a shop window. I immediately felt this piece of jewellery was tailor-made for me—a colourful, chaotic variation of the classic tennis necklace. The original piece is from Swarovski’s Gema collection. After learning its name, I did some further research on the organically-shaped, vibrantly coloured crystals. I reluctantly and carefully unclasped the jewellery and began planning to create my own beaded version!

me wearing the original necklace for reference!

I only recently sourced some smaller Swarovski crystals of congruent shapes to create an interpretation of the original necklace. I still wanted to keep the irregular, asymmetrical flow throughout the piece. I mixed these “perfect” crystals with natural pearls, glass beads of varying shapes, and rose quartz stones. One of the local bead shops provided a classic paint palette to organize various beads in whichever way you want—I loved this idea! Utilizing this paint palette with the beading tray made the process easy, quick, and organized. 

a few of the beads I picked up for this project:)

Another change I made was instead of randomizing the colours, creating an eclectic array of hues—I opted for a more organized gradient of colours, sprinkling pink throughout as a neutral. Adding a neutral tone to a piece is beneficial for creating balance, and this colour will vary depending on your aesthetic tastes and wardrobe. I chose this light pink since I often wear a variation of this shade!

after finalizing the arrangement of the colours

If I were to remake this piece, I would implement more unusual hues and shades of each colour for more dimension. Even though I will never replicate this necklace exactly, I am happy with the final product! Like my rainbow lanyard, I love how this necklace exhibits colour and interest from all angles.

the final piece!

multimedia in the classroom

Today, our guest speaker led a lesson on the multimedia learning theory and on teaching with the dual-coding theory. I enjoyed this lecture since it contained practical information and advice for our classrooms. It also spoke to a personal interest I have mentioned in fostering a creative and adaptive educational environment.

The dual-coding theory proposes that information is processed in both visual and verbal codes, suggesting that students have two separate cognitive systems for learning. For teaching with the dual coding theory in mind, educational videos and websites like Brain Pop, read-along storybook videos, and simple documentaries of animal behaviours are beneficial. This theory rings true for me, so it was interesting learning about how the concept is defined and illustrated on various educational platforms.

photo created on DALL • E “represent multimedia in the classroom, colourful”

After researching the theory, I realized my practicum classroom has benefited from it, with a video on ecosystems implemented into a science lesson. Since the classroom is split into 2nd and 3rd grade, the second graders had a lesson on frogs, while the older students had a lesson on complex ecosystems as a whole. After their lessons and individual work, the entire class was shown an engaging educational video reiterating the organization of ecosystems. Even though the younger students had no prior knowledge of ecosystems in a structured setting, they all enjoyed the video, and they will likely remember some concepts when they need to recall this information next year!

My L2P mentor teacher for this practicum has been very helpful, providing me and my teaching partner with lots of resources and lesson plan ideas. For the science lesson above, she utilized GenerationGenius.com. There are videos, lesson plans, teacher guides, and more! I knew there were educational videos on the internet, but this website is indispensable since it centralizes all of the resources into one platform. On top of this, GenerationGenius has a level of quality assurance that can’t be guaranteed with a user-generated website such as YouTube, as there’s always a risk of inappropriate content and unpredictable autoplay.

photo created on DALL • E “represent multimedia in the classroom, vibrant

Seeing this excitement for science in an elementary classroom was wonderful. I am hoping to create a general guide for my own lesson plans to implement illustrations and engaging videos to help students with meaningful and effective learning through this theory. I appreciate this style of teaching and learning—I am constantly thinking of ways to integrate interactive means of learning and fostering a fun classroom environment.

Plus, everyone loves when a film is played in class!

reviving an old painting: with animals!

Hello! This week, I decided to turn an incomplete, abandoned artwork into something new. While this was not technically repurposing, it felt like an emotional version of recycling a “failed” project. A few months ago, I started an underpainting of sheep in a meadow. Of course, I stopped at white blobs on a green-brushed background. I love animals, so I assumed this piece would motivate me to get back into the habit of painting when I felt I needed a creative outlet. Painting is very intuitive for me. I rarely use reference photos as it’s more about the fun I have during the process. However, now that I have fallen out of the routine of using this medium, I think the hardest thing is getting the paint on a blank canvas. While I lost the motivation to finish this painting, I wanted to create something less daunting with these adorable animals!

A close-up of my wildly unfinished painting of “sheep” in a “meadow”…

Since I had quite a specific theme for this necklace, I had to source a few particular beads. I thought I would go to one of the numerous bead stores around town, but I knew none had the little animal-themed beads I was looking for. After some research, I found the best place to source them is Etsy! This website is the best place to find handmade, high-quality beads with fast shipping. I wish I could make these adorable glass beads by hand, but I unfortunately don’t know lampworking yet. Maybe a project for the future!

Here are the cute beads from Etsy and Michaels!

This necklace was definitely a practice in patience. I started building this piece without a plan, with just a few farm animal beads and wire. I was unhappy with the first version I strung…and the second. I was finding it hard to find the “perfect” supporting beads for these specialty charms. So, I unstrung the whole necklace, chose a new colour palette, and tried again. The third time, as they say, was the charm. I was finally happy with the final colour palette and materials I used. It wasn’t perfect, but I didn’t care. This ability to easily revise the layout and design of a piece is one of the things I love most about jewellery making.

This is my second attempt… my first try was not very photogenic…

Here is the colour palette that I landed on! I found that these “beadsmith” trays are super helpful in planning the arrangement of the beads.

To make a “centrepiece” for the necklace, I strung my bead onto a small pin with a stopper. I then added some tiny colourful beads to keep the sheep from slipping off the pin.

I ended up switching the support beads, yet again, and crimping the loop sideways so that the little sheep could sit facing forward!

This project allowed me to practice patience and gave me a sense of accomplishment for persevering…unlike my painting. This piece might not be profound, but the trial-and-error process was enjoyable. I wanted to demonstrate how inspiration in this medium of expression can come from anything. It doesn’t necessarily have to be super meaningful or powerful. I found that this type of jewellery-making can act as more of a lighthearted activity in comparison to painting, which can often be an emotional experience. Anyway, here is the final piece, I may open the clasp and restring the entire necklace again one day, who knows!

the first piece: a rainbow lanyard!

Encouraging creativity in students is one of the most important aspects of incorporating jewellery-making into the classroom. In my capacity as a student teacher, I chose to do this in the classroom through my own example. Instead of keeping the standard fabric lanyard for my nametag, I saw a chance to have some colour and fun in the classroom on Wednesdays! I created a rainbow, beaded lanyard, specifically with the idea of fostering the imagination and originality of the students. 

This project seemed like a relatively small detail to my Link2Practice days, but the students immediately noticed my new and improved lanyard, saying they liked my necklace. Many of them pointed out the different colours and charms, usually the little glass pig!

this is the cute little bead, from Michaels

The lanyard is made out of a mixture of glass, stone, plastic, wooden, and ceramic beads that I sourced from several different places over the course of a month. I didn’t want to limit myself to only one material for the lanyard, because it was important to me that it was dynamic and interesting to look at. I also had to keep the weight of the piece in mind, as I would be wearing it for the entire day. I chose the varying beads with an organic pattern in mind, using only the colours of the rainbow as a guideline. I was excited to create a piece that would be viewed primarily by the students, as it gave me an excuse to string the lanyard with any size, shape, and material of charm I wanted. I find I like the jewellery I wear in an everyday setting to be more refined and, while still colourful, more dainty. However, designing for a child’s eye comes with less self-judgement and encourages more creativity.

It was essential to me that the lanyard was a rainbow of colours. As I couldn’t limit myself with materials, I also didn’t want to limit the colour palette! I have a vision of how my future classroom will look, demonstrated by the resources I’ve already created, and I designed the lanyard with this vision in mind. The importance of children’s exposure to colour goes beyond my aesthetic taste. Colour, in any setting, fosters an engaging and vibrant environment that enhances creativity, imagination, and cognitive development. Specifically in a classroom, using a variety of colours promotes active learning and a positive emotional connection to their place of education. Many studies explore this topic, and I encourage you to do your own research on the connections and importance that colour has in our lives! 

photo created on DALL • E

Before creating this piece, I knew I wanted to use some specific charms, such as the beloved pig and painted ceramic beads, but I had no exact layout to work with. After trimming a piece of jewellery wire about forty inches long, I strung the beads with a temporary spring-clasp on one side, starting with pink! I worked my way to blue, using white beads throughout to break up the saturation and make the transitions smoother. 

I would often take a break, holding up the string of beads to make sure I liked it. When I wanted to change something, I just removed a few beads and re-strung them in a new order. This process sounds very mundane and tedious, but seeing this piece come together was so fun and motivating for me. After attaching the clasps, I put the lanyard on and wanted to wear it everywhere, even outside of the classroom. I loved creating a piece so personal that I am able to share with my students and classmates every week! I closed off the lanyard with two lobster-style clasps to attach to my nametag. It is easily detachable, which means I could always make more. I am already thinking of more opportunities, friends, and holidays to make lanyards for!

the first steps…

My personal history with, and passion for jewellery-making and teaching are what initially sparked my inquiries. I wondered how this adaptable skill could be beneficial for my future students and career. There are three categories in which I will present this intersection of creation and education throughout this inquiry project: my personal connection to the craft, how that connection relates to teaching, and ideas for applied learning in the classroom. I have created a guideline for myself to reference in future blog posts—focusing on why I chose jewellery-making. Why is jewellry making a valuable skill for a future elementary teacher to acquire? 

photo created on DALL • E

As someone who loves all kinds of art, the inspiration I’ve felt in making jewellery is unlike any other medium I’ve tried, there’s a nearly endless amount of pieces I can, and already want to make.

“Art” is a very broad term, although I find this defines my inquiry project, rather than just accessorizing. The process is always more enjoyable than admiring the final product. Jewellery-making is a wonderful medium of self-expression and artistic exploration. There are no limits on what materials or colours you can utilize, or what shapes you can create—you are not confined by a square canvas! Making jewellery is a gratifying experience because it is inherently designed to be displayed as wearable art. The ability to wear my creations helps build my confidence and affirms my creativity. 

The reasons I find this pursuit personally fulfilling are easily transferable to an elementary classroom setting. From building connections and memories with family and friends to telling a story through the materials I use, jewellery making is suitable for all ages and skill levels. It can be difficult to achieve emotional connection with individual students in a full classroom. Doing a group activity such as jewellery making can make it easier to get to know them, and open up conversations outside of exclusively school-related subjects. Everyone has a story to tell, whether that be a personal memory or a mnemonic device related to a lesson or concept we learned. Making a wearable, personalized piece of art connects kinetic, hands-on learning with understanding over memorization. Going beyond this, I would love to encourage all kinds of creativity as a means of building confidence, patience, and resilience in all of my future students!

photo from mini mad things, featuring an inexpensive necklace project!

As the educational environment continues to evolve, elementary teachers are exploring innovative approaches to engage young students, while implementing creative, meaningful learning into the curriculum. Jewellery making is one of many methods that can be used to foster imagination while unveiling a spectrum of educational benefits! A simplified version of this craft can be included in a lesson as a means to enhance creativity in teaching, as well as teach fine motor skills, patience, organization, planning, and much more. Planning the piece you’d like to make, and choosing colours and shapes, is another method of teaching good organization—such as using their agendas to plan the day. Since jewellery making requires focus and precision, this can be a quiet activity for students to pick up if they have finished class work. 

photo created on DALL • E

Facilitating interdisciplinary connections between the subject matter and a creative task is a wonderful way to encourage understanding, rather than repetitive studying, worksheets, or memorization. Of course, writing with a pencil on paper is essential in the classroom, however, if broadening the spectrum of learning with base ten blocks or chips can be used in mathematics, there are essentially limitless kinetic methods we can bring into the classroom! Jewellery-making involves elements of mathematics (especially in measurement and geometric shapes), social studies (considering cultural and historical influences), and even science (when understanding material properties).  An educator with skills in jewellery-making, or other creative fields, can integrate these interdisciplinary connections into their curriculum, providing a better understanding of various concepts more enjoyably and imaginatively.

I will be exploring these thoughts further throughout my inquiry project, experimenting with a number of pieces, all with a different creative focus in mind. I have several projects lined up, and my next post will be focused on a lanyard I created for my Wednesday Link2Practice teaching experience!

interactive teaching resources!

Resources for teaching and learning can be found anywhere, from books to social media to specific teaching websites. Since the internet is an infinite platform of information, I like to use Pinterest to organize teaching and classroom resources, ideas, and websites that are effective for an elementary classroom. With this visually informational website, you can create private “boards” for each unit, organizing specific resources within each board into “sections”. It’s easy to find these resources, as I can use the search feature to look up exactly what I need.

Instagram is another useful platform for teaching resources. I usually have to do a bit more research, but when I find and follow a professional page that provides resources and teaching content that I enjoy, new ideas will pop up as they post new material—provoking inspiration for my own creations. Since Instagram is a somewhat personal platform, it motivates future teachers with exposure to “real-life” classroom environments, ideas, and (usually free) resources.

I love doing graphic design, so finding resources for inspiration rather than a direct download works best for me. I have created classroom designs throughout the last couple of years, including a number line, organizational labels, and various colourful posters. However, this takes time, which I had a lot more of before starting university. I am sure when I have a classroom of children to teach every day I will have print-ready resources at my disposal.

When looking into downloadable resources, from worksheets to posters, I find I like them to be editable. This is easier than creating a graphic or assignment sheet from scratch, while still providing room for creativity and individuality in my classroom. Creating interactive posters and objects (like reading buddies) encourages a safe, community-oriented space. Oftentimes students are not comfortable speaking up, so this environment can allow them to have their own voices without feeling vulnerable in front of their peers. An example of this is a feelings chart.

This was not my idea, although I knew I had to create my own when I saw it here. Having a lesson on emotions and personalizing this feelings chart is ideal, so I also created a format where students could draw their own emotions. I would supply this in a designated area of the classroom where students can sit quietly, read, play with stress-relieving toys, and reflect on behaviours in a calm and meaningful way. This chart allows individual students to self-evaluate their emotional state without a public penalty for acting outI also love the interactivity of this chart, it can be used at home or in the classroom to express feelings with the teacher if they don’t want to talk about it. This is a wonderful alternative to escalating an issue that could result in a meltdown.

this cute turtle from jellycat is what I am picturing for the idea below!

Another idea that would be great for younger elementary grades is the Tattle Turtle. This may reduce the amount of unnecessary tattling. He also doubles as a very easy class pet! I love this concept, but to be honest, I know lower grades will use this as a place to write ANYTHING. This is still encouraged, as it allows for a safe setting for students to submit questions, ideas, and even their “feelings chart” sheet from above! I am sure you could get creative and use any animal and create an alliteration, like a Tattle Teddy—I just love the idea of a message box as a form of communication throughout the school year. I would of course have a lesson before introducing them to the Tattle Turtle, explaining what IS and IS NOT tattling, and what should be told to me directly for student safety and socialization.

I’m excited to continue looking for more effective, engaging, and easy-to-use resources for future classrooms!

my initial thoughts

Before starting Technology and Innovation in Education, I thought the lectures would focus on learning specific computer programs for our future classrooms. After the first lesson, it became clear that this course emphasizes creativity and experimentation. We will be learning and practicing the ability to adapt with technological advancements and teaching an understanding of technology as it changes throughout our careers. Individualizing learning seems inherently creative to me, as it engages the students and motivates them to learn the material effectively and purposefully.

photo by markus spiske on unsplash

My first impression of the Free inquiry project was a mix of excitement and anxiety. While looking through the provided examples, I knew I couldn’t just focus on bettering a pre-existing skill or hobby. I had to create something. I wanted to start something new based on my desire to connect learning and teaching with creativity, rather than just following the curriculum. 

I am familiar with painting, so my mind immediately went to two-dimensional forms of visual art. However, I needed to try something new, so I thought back to my creative beginning. Jewellery! My experience with jewellery-making started when I was about 5. I remember my sisters and I had an enormous bucket filled with various plastic beads and elastic string. I would make bracelets, rings, necklaces, or anything I could tie in a knot. 

photo by rea tekoro on unsplash

Starting this project is daunting. Even with the narrowed path of “jewellery making” there are still endless possibilities of colours, styles, materials, and techniques. It seemed so much simpler with my string and bucket, but I am so excited to start creating and documenting how my style evolves throughout the process.Â